Phone: 0333 444 1045
Pet Flap Doors

Installation Guide: Fitting a Pet Flap Door with Precision

Integrating a pet flap door into your home significantly enhances your pet’s independence, providing them with the freedom to explore outdoors at their leisure. Achieving a perfect installation is paramount, and it all begins with accurate measuring to ensure the pet flap door is the ideal size for your furry friend. This guide is designed to assist you through the process, ensuring a smooth and successful fitting.

Step 1: Select the Right Pet Flap Door and Measure Your Pet

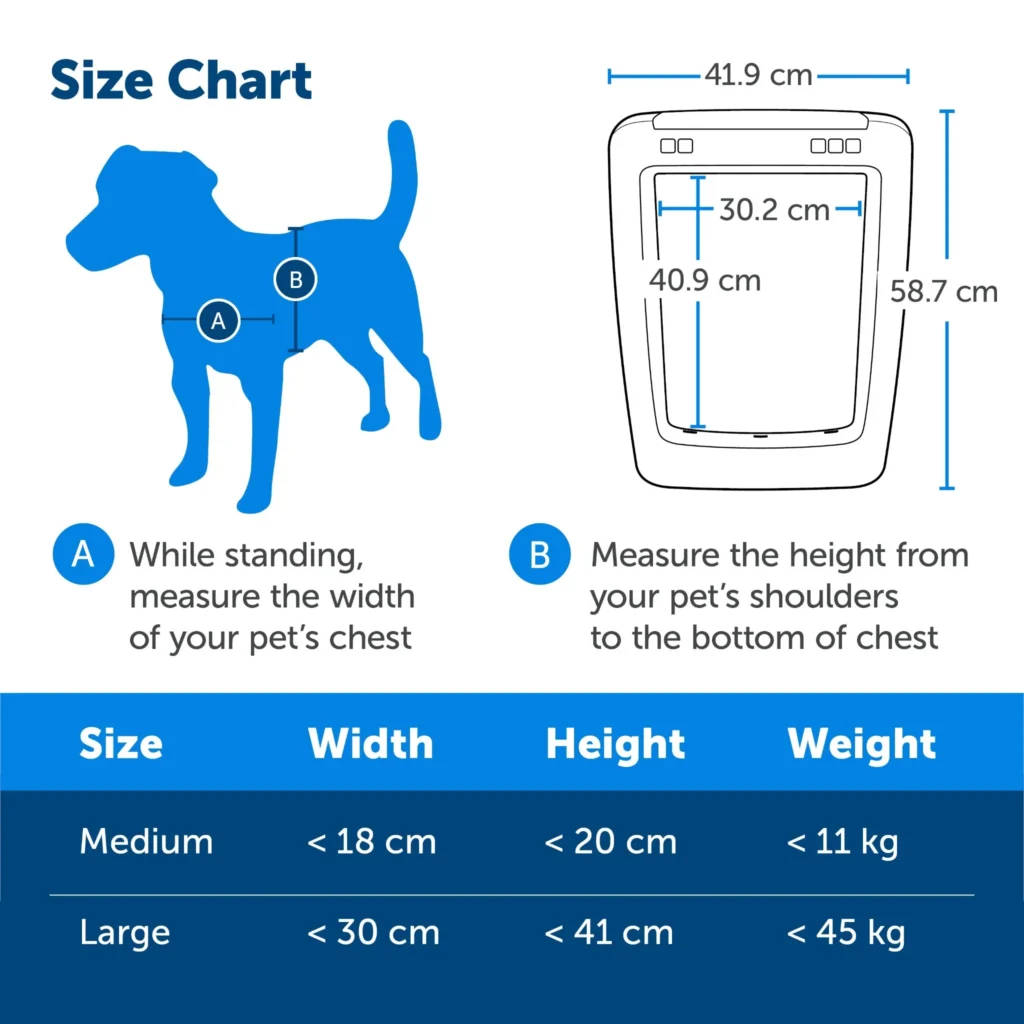
Before you proceed to purchase a pet flap door, taking precise measurements of your pet is essential.

How to Measure Your Pet:

  • Height: Measure from the floor to the top of your pet’s shoulders, then add approximately 5 cm. This will establish the height at which the bottom of the pet flap should be installed.
  • Width: Measure the widest part of your pet, likely across the shoulders or hips, and add around 2 cm. This gives you the minimum width required for the pet flap.

Once you have these dimensions, choose a pet flap door that is suitable for your pet’s size and compatible with your door or wall material.

If the idea of measuring and installing the pet flap door yourself seems daunting, why not consider our nationwide delivery and fitting service? We take care of everything, ensuring a hassle-free experience. Get a quote now at Pet Flap Doors.

Easy Pet Flap Door Installation

Step 2: Gather Your Tools and Materials

Ensure you have all the necessary tools and materials ready:

  • Tape measure
  • Pencil
  • Jigsaw or reciprocating saw
  • Drill with various bits
  • Screwdriver
  • Sandpaper (optional)
  • Pet flap door kit, including the template

Step 3: Position the Template

Your pet flap door kit should come with a template for marking the cut on your door. Align the bottom of the template with the height measurement from your pet, ensuring it is straight using a spirit level. Trace around the template with a pencil.

Step 4: Cut the Opening

Drill a starter hole within the outlined area, large enough to fit the blade of your saw, and carefully cut along the pencil line.

Step 5: Smooth the Edges

Use sandpaper to smooth any rough edges around the cut, preventing any potential injury to your pet.

Step 6: Install the Pet Flap Door

Check the fit of the pet flap door in the opening, making any necessary adjustments. Follow the manufacturer’s instructions to secure it in place with screws, ensuring it operates smoothly and locks securely if applicable.

Pet Flap Door Installation

Step 7: Train Your Pet

Your pet might require some training to become accustomed to their new door. Be patient and use positive reinforcement to encourage them.

Conclusion

Accurate measuring is key to a seamless pet flap door installation. By following these steps or opting for our nationwide fitting service, you ensure your pet enjoys their newfound freedom safely. Enjoy the convenience and peace of mind a well-installed pet flap door brings to your home.